Related Posts
Beekeeping, once considered a niche hobby, is now gaining popularity among people who are passionate about the environment, gardening, or simply the idea of having their own source of fresh, local honey. If you’re intrigued by the world of beekeeping and eager to embark on this buzzing journey, you’ve come to the right place. In this comprehensive beginner’s guide, we’ll take you through the essential steps, knowledge, and considerations for starting your beekeeping adventure.
Section 1: Understanding the Basics
1.1 The Honeybee Colony
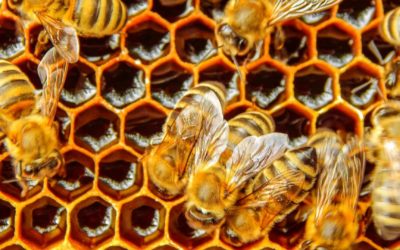
Before embarking on the fascinating journey of beekeeping, it’s essential to delve into the heart of the operation: the honeybee colony. A honeybee colony is a complex and highly organized society comprising various castes, each with distinct roles and responsibilities. Understanding how these bees function as a superorganism is fundamental to successful beekeeping.
- The Queen Bee: At the heart of the colony is the queen bee, often recognized by her elongated abdomen. Her primary role is to lay eggs, as she can lay up to 2,000 eggs a day during peak seasons. The queen’s pheromones help maintain harmony within the colony.
- Worker Bees: The worker bees, which constitute the majority of the colony, are infertile females. They fulfill an array of duties, including foraging for nectar and pollen, tending to the brood, cleaning the hive, and guarding the entrance. As versatile members of the colony, they perform various tasks according to their age.
- Drone Bees: Drones are the male bees in the colony, and their primary purpose is to mate with queens from other colonies. They don’t participate in typical hive chores and are evicted by worker bees during resource-scarce periods.
The coordination and cooperation among these bees create a superorganism that functions seamlessly to ensure the colony’s survival and growth. For instance, worker bees maintain the hive’s temperature, defend it against intruders, and make collective decisions like swarming to form new colonies. Learning about these roles and interactions is like uncovering the intricate pieces of a puzzle that constitute the thriving world of a honeybee colony, and it’s a vital foundation for any aspiring beekeeper.
1.2 The Hive Components
Beekeeping requires specific equipment that plays a crucial role in maintaining a healthy and productive bee colony. To get started in this exciting venture, you must familiarize yourself with these essential tools and their functions, ensuring the well-being of your bees and the quality of your honey production.
Beehives
The beehive is the home for your bee colony. It consists of boxes stacked on top of each other, each containing frames where bees build honeycombs and store honey. Common beehive types include Langstroth hives, top-bar hives, and Warre hives. Choosing the right hive for your needs is essential.
Frames
Frames are placed inside the beehive boxes and serve as the foundation for honeycomb construction. Bees build comb on these frames, where they store honey, raise brood (bee larvae), and store pollen. Frames are designed for easy inspection and honey extraction.
Smokers
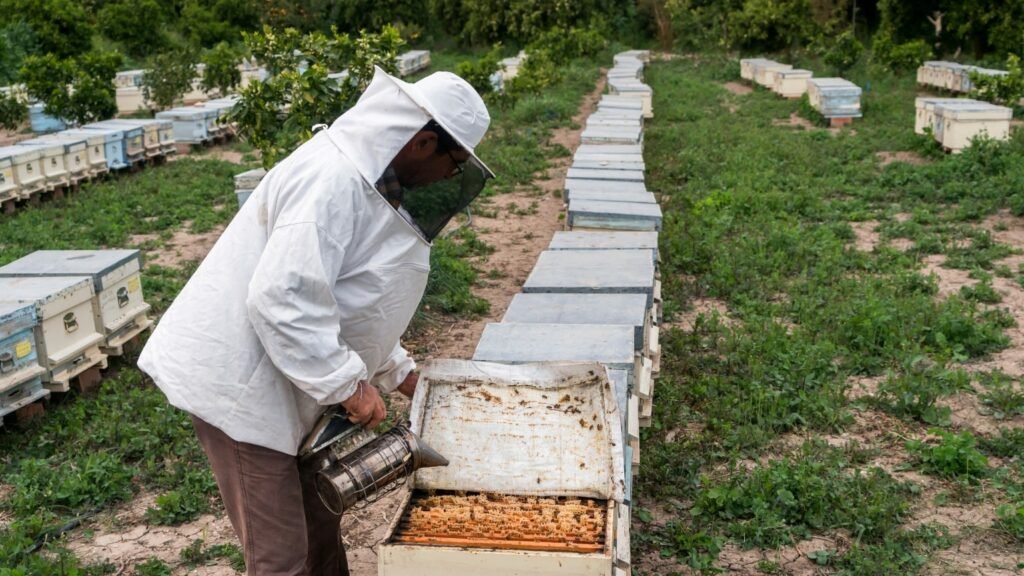
Beekeepers use smokers to calm bees during inspections and honey collection. The smoke masks alarm pheromones, making the bees less aggressive. A well-functioning smoker is an invaluable tool for minimizing stress to the bees and the beekeeper.
Protective Gear
Beekeeping can occasionally involve confrontations with defensive bees. Therefore, it’s crucial to have protective gear. This includes a beekeeping suit, gloves, and a veil to shield your body and face from stings.
Understanding the purposes and usage of these tools is paramount in ensuring the proper management of your bee colony. It allows you to conduct hive inspections, harvest honey, and maintain your bees efficiently while safeguarding both their well-being and your own safety. Familiarity with hive components and equipment is a foundational step in becoming a responsible and successful beekeeper.
Section 2: Location and Legalities
2.1 Choosing the Right Location
Selecting the ideal location for your beehive is a pivotal decision that greatly influences the health and productivity of your bee colony. To make an informed choice, consider the following essential factors:
1. Forage Sources
The availability of forage sources, particularly flowering plants, is a primary consideration. Bees need nectar and pollen from these sources to produce honey and sustain the colony. An area rich in diverse, bee-friendly plants is ideal. Local flora, flowering trees, and crops can provide ample forage.
2. Sun Exposure
Bees thrive in sunny locations. Choose a spot that receives plenty of sunlight throughout the day. Sunlight warms the hive, promotes activity among bees, and deters pests and diseases. Avoid locations with excessive shading, as they can lead to weaker, less productive colonies.
3. Wind Protection
While sunlight is crucial, too much exposure to strong winds can be detrimental. Select a site that provides some protection from prevailing winds. This prevents heat loss and wind-chill stress on the bees during cold weather.
4. Local Climate
Your local climate plays a significant role. Bees are adaptable, but they require a climate that allows them to forage and maintain their hive throughout the year. Understanding your region’s weather patterns and the specific needs of your bee breed is essential.
5. Water Access
Bees require a source of water near the hive. Ensure there’s a clean and reliable water source nearby, as bees need water for cooling the hive, diluting honey, and feeding larvae. This could be a pond, a birdbath, or even a specially designed bee waterer.
6. Regulations and Neighbours
Check your local regulations and consult with your neighbours before setting up a beehive. Some areas have restrictions on beekeeping due to safety or zoning concerns. Open communication with your neighbours is essential to address any potential concerns or conflicts.
7. Hive Accessibility
Consider the accessibility of the hive for routine inspections, maintenance, and honey extraction. You should be able to approach the hive without disturbing the bees excessively.
By assessing these factors, you can select a location that promotes the health and well-being of your bee colony. Remember, beekeeping is a partnership between you and your bees, and a well-chosen hive location can set the stage for a successful and rewarding experience.
2.2 Regulations and Permits
Engaging in beekeeping requires more than just setting up a beehive and tending to your bees. It involves understanding and adhering to local regulations and permits. Navigating the legal aspects of beekeeping is crucial for several reasons:
Safety
Local regulations often focus on safety, both for the beekeeper and the community. This includes rules on hive placement, hive security, and protection measures. Complying with safety regulations helps prevent accidents, stings, and potential conflicts with neighbours.
Zoning and Land Use
Some areas have zoning regulations that dictate where beehives can be placed. These regulations help ensure that beekeeping activities do not interfere with other land uses, such as residential or commercial areas. Compliance with zoning laws prevents potential disputes with neighbours and local authorities.
Disease Control
Local governments may have regulations in place to monitor and control the spread of bee diseases. These regulations can include hive inspections and quarantine measures to prevent the spread of diseases that could harm both your colony and the broader beekeeping community.
Environmental Considerations
Laws may exist to protect the environment and native species from invasive or non-native bees. This is particularly important if you plan to keep non-native bee species or if you’re located in an ecologically sensitive area.
Neighbour Relations
Maintaining good relations with your neighbours is vital. Open communication and compliance with local regulations can prevent disputes or concerns about having beehives nearby. Be a good neighbour by addressing any worries or questions your neighbours may have.
Legal Aspects of Beekeeping
Navigating the legal aspects of beekeeping typically involves the following steps:
- Research Local Regulations: Start by researching the beekeeping regulations specific to your area. These regulations can vary greatly from one location to another, so it’s essential to understand what applies to your situation.
- Obtain Necessary Permits: Depending on your location and the scale of your beekeeping activities, you may need permits or licenses. This could include permits for hive placement, health certificates for your bees, or even tax-related permits for honey sales.
- Compliance with Best Practices: Even if local regulations are minimal, it’s advisable to follow best practices for beekeeping. This includes hive management, pest control, and safety measures to ensure that your beekeeping activities are conducted in a responsible and sustainable manner.
- Join Local Beekeeping Associations: Local beekeeping associations or clubs can be valuable sources of information regarding local regulations and permitting. They often have experienced beekeepers who can guide you through the process.
- Keep Records: Maintain records of your activities, inspections, and treatments. These records can be essential for demonstrating compliance with regulations and best practices if any questions or concerns arise.
- Seek Guidance: If you’re unsure about any aspect of beekeeping regulations or permits, seek guidance from local authorities, beekeeping mentors, or experienced beekeepers. They can provide invaluable insights and ensure you’re on the right track.
Ultimately, understanding and following local regulations and permits is an essential part of responsible beekeeping. It not only keeps you in compliance with the law but also contributes to the safety and success of your beekeeping endeavour.
Section 3: Acquiring Bees
3.1 Buying Bees
In this section, we will delve into the details of obtaining bees and the importance of assessing their health before making a purchase. Bee acquisition is a crucial step in your beekeeping journey, and the method you choose can significantly impact the success of your colony.
Package Bees
Package bees are one of the most common ways for beginners to start beekeeping. These packages consist of a set quantity of worker bees, often around 10,000 to 15,000, and a mated queen. Here’s what you should consider:
- Source: Ensure that you purchase your package bees from a reputable source, such as a commercial beekeeper or a local apiary. A trusted supplier can provide healthy bees with proven genetics, reducing the risk of disease or aggression.
- Quantity: The size of the package matters. Typically, a 3-pound package is the most common choice, but some beekeepers opt for 4 or 5-pound packages. The size you select will depend on your preferences and the strength you want your colony to start with.
- Inspect the Queen: Examine the queen bee in the package. A healthy queen is active and vigorous. She should be moving around the cage, and her attendants should be tending to her.
Nucleus Colonies (Nucs)
Nucleus colonies, often referred to as nucs, provide a more advanced starting point compared to package bees. Nucs are like mini-colonies, typically consisting of several frames that include worker bees, brood (developing bees), stores of pollen and honey, and an active, mated queen. Here are key considerations:
- Source and Reputation: Just as with package bees, it’s vital to purchase nucs from a trusted source. Reputable suppliers often maintain healthier colonies and queens with desirable genetics.
- Assessing Frames: Open the nuc to inspect the frames. Look for healthy brood patterns – they should be well-organized and uniform. This indicates a strong queen. Check for signs of disease or pests in the frames. Healthy frames are essential for a successful colony.
Swarm Capture
Capturing swarms is a cost-effective method but is generally not recommended for beginners due to its unpredictability and potential risks. Swarms are clusters of bees in transition, and while they’re a free source of bees, they can be challenging. Here’s what to consider:
- Experience: Capturing swarms requires a certain level of beekeeping experience. Swarms can be unpredictable, and they may come with health issues, such as Varroa mites or diseases.
- Equipment: You’ll need the appropriate equipment, including a swarm box or hive, to capture and transport swarms safely.
Evaluating Bee Health
Regardless of the method you choose, assessing the health of the bees is a non-negotiable step. Here’s what to look for:
- Active Foraging: Observe the bees’ activity level. Active bees flying in and out of the hive indicate a healthy colony.
- Brood Patterns: When inspecting frames, assess the brood patterns. They should be well-organized, and you should see larvae in different stages of development. An irregular brood pattern can be a sign of issues.
- Behaviour: Bees should be calm and not overly aggressive. Agitated bees could indicate stress or problems within the colony.
- Disease and Pests: Check for visible signs of disease, such as disfigured wings or unusual behaviour. Look for the presence of Varroa mites, one of the most common threats to bee colonies.
By thoroughly understanding these methods of obtaining bees and mastering the art of evaluating bee health, you’ll set the stage for a successful and thriving beekeeping journey. Remember, healthy bees are the cornerstone of a productive and enjoyable beekeeping experience.
3.2 Capturing Wild Swarms
An alternative way to acquire bees is by capturing wild swarms. We’ll show you how to identify swarm behaviour and safely collect a swarm for your hive.
Identifying Swarm Behavior
Before you can capture a swarm, you must recognize the signs of swarm behavior. Swarming is a natural process in the life of a honeybee colony and usually happens in the spring or early summer when the hive becomes overcrowded. Here’s how to identify swarm behavior:
- Increased Activity: Swarming often begins with increased activity around the hive. Bees may become more restless and agitated.
- Queen Cells: Check for queen cells in the hive. These are larger, peanut-shaped cells that are distinct from worker brood cells. The presence of multiple queen cells indicates that the colony is preparing to swarm.
- Noise: Listen for a noticeable buzzing sound around the hive, which can be an indicator of swarm preparation.
- Beard-Like Clusters: Swarms often start as a beard-like cluster of bees on the outside of the hive. This cluster can grow in size as the bees prepare to leave.
Capturing the Swarm
Once you’ve identified swarm behavior, it’s time to capture the swarm. Here’s how to do it safely and effectively:
- Gather Equipment: You’ll need a few essential tools, including a hive body, frames with foundation, a bottom board, a telescoping cover, and a bee suit with protective gear. Have a spray bottle filled with a sugar water solution (1:1 sugar and water) on hand to calm the bees.
- Choose a Hive Location: Select a location for your swarm hive. It should be nearby but not too close to the original hive to prevent swarming again.
- Place the Hive Body: Set up the hive body, bottom board, and frames in the chosen location. You can also add some old brood comb or frames to make the new hive more appealing to the swarm.
- Shake or Brush the Swarm: Gently encourage the bees to move into the new hive. You can do this by gently shaking the branch or surface they’ve gathered on or by brushing them into the hive.
- Leave the Hive Open: Once the majority of the bees are in the hive, leave it open for the remaining bees to find their way inside. You can place a branch or a piece of cardboard at the entrance to create a ramp for the bees.
- Close and Transport: After a day or two, when you’re confident that most of the bees have entered the new hive, close it up and transport it to your chosen beekeeping location.
Safety and Considerations
- Always wear protective gear when handling swarms to avoid stings.
- If you’re not experienced in swarm capture, consider seeking guidance from a more experienced beekeeper or local beekeeping association.
- Swarms are generally more docile and less defensive since they have no hive or brood to protect, but still handle them with care.
Acquiring bees through swarm capture can be a rewarding experience for beekeepers. It allows you to establish a colony with locally adapted bees and promotes genetic diversity within your apiary. However, due to the unpredictability of swarms, it’s essential to be well-prepared and knowledgeable about the process to ensure a successful capture and transition to your hive.
Section 4: Hive Management
4.1 Hive Inspection
Regular hive inspections are essential for monitoring the health and development of your bee colony. Learn when, how, and what to look for during these inspections.
The Importance of Regular Hive Inspections
Regular hive inspections are a cornerstone of successful beekeeping. These inspections serve several crucial purposes:
- Monitor Hive Health: Regular inspections allow you to assess the overall health of your bee colony. By examining the hive, you can detect signs of disease, pests, or other issues early, which is vital for intervention and prevention.
- Assess Colony Development: You can track the progress and development of your colony. Observing the number of bees, brood patterns, and available resources (like honey and pollen) provides insights into the colony’s growth and productivity.
- Queen Performance: You can evaluate the queen’s performance by checking for the presence of eggs, larvae, and capped brood. A productive queen is essential for a thriving colony.
- Disease and Pest Management: Early detection of diseases and pests, such as Varroa mites, is critical for addressing these issues promptly. Timely intervention can save your colony from potential devastation.
How to Conduct Hive Inspections
Here’s a step-by-step guide on how to perform a hive inspection:
1. Choose the Right Time: Inspect the hive on a sunny, calm day when most of the forager bees are out. This minimizes disturbance and makes the inspection safer.
2. Prepare Equipment: Ensure you have the necessary equipment ready, including a bee suit, veil, gloves, smoker, hive tool, and a notepad for notes.
3. Approach Cautiously: Approach the hive gently and calmly. Smoke the entrance to calm the bees and reduce alarm pheromones.
4. Remove the Cover: Carefully remove the outer cover, inner cover, or any other protective layers.
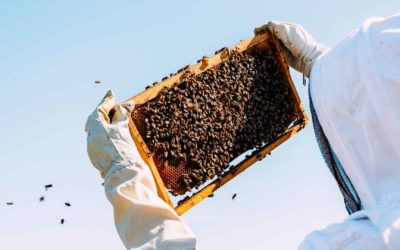
5. Examine Frames: Lift each frame one by one. Observe the frames for brood patterns, honey stores, and the presence of the queen. Look for eggs, larvae, and capped brood. Pay attention to any irregularities, such as sunken cappings or dead bees.
6. Check for Disease and Pests: Inspect for signs of disease (like foulbrood) or pests (like Varroa mites). You may need to conduct specific tests for mite levels.
7. Inspect Hive Components: Examine the bottom board for debris, dead bees, or pests that may have fallen through the screened bottom. Assess the general condition of the hive components.
8. Record Findings: Take notes during the inspection, documenting what you find. This helps you track the hive’s progress over time.
9. Close the Hive: After completing the inspection, gently return each frame to its original position. Close the hive, making sure all components are secure.
What to Look Out For
- Brood Patterns: Healthy brood patterns include a mix of eggs, larvae, and capped brood. Irregular patterns or spotty brood may indicate issues.
- Queen Performance: Spotting the queen or evidence of her presence (eggs, larvae) is crucial. If you can’t find the queen, look for her telltale signs.
- Honey and Pollen Stores: Check the amount of stored honey and pollen. Sufficient reserves ensure the colony’s survival during periods of scarcity.
- Disease and Pest Signs: Be vigilant for signs of diseases (foulbrood, chalkbrood) and pests (Varroa mites, hive beetles). Act swiftly if you detect any problems.
Regular hive inspections empower beekeepers with the knowledge needed to maintain healthy and thriving colonies. It’s a skill that requires practice, patience, and a keen eye. Remember to work gently and methodically to minimize stress to the bees and enhance your beekeeping experience.
4.2 Queen Management
A productive queen is crucial for a thriving hive. We’ll discuss queen rearing, introduction, and replacement techniques to maintain a robust bee population. Let’s delve into the crucial topic of queen management, which includes queen rearing, introduction, and replacement techniques for maintaining a thriving bee population.
Importance of a Productive Queen
The queen bee is the heart of a honeybee colony. She is responsible for laying eggs and ensuring the colony’s survival and growth. A productive queen contributes to a strong, healthy hive, which is why proper queen management is vital for beekeepers.
Queen Rearing
Queen rearing is the practice of intentionally raising queen bees, either to replace an underperforming queen or to create new colonies. Here’s an overview of the queen rearing process:
1. Identifying the Need: Queen rearing begins with identifying the need for a new queen. This could be due to an ageing or failing queen, or when splitting a hive to create a new colony.
2. Grafting or Using Queen Cells: There are different methods to rear queens, but one common approach is grafting. In grafting, beekeepers select young worker larvae (usually less than 24 hours old) and transfer them to specially designed queen cups. These larvae are then raised as queens.
3. Nurse Bees: The queen cups containing the selected larvae are placed in a hive with nurse bees, which care for the developing queens. These nurse bees feed the larvae royal jelly, a nutrient-rich substance that differentiates a future queen from a worker bee.
4. Queen Emergence: After approximately 16 days, the queens emerge from their cells. They then go on mating flights to mate with drones from other colonies, ensuring genetic diversity.
5. Assessing the Quality: After mating and egg-laying begins, the quality and performance of the newly reared queen are assessed. A good queen should be prolific in her egg-laying, have a strong brood pattern, and exhibit a calm temperament.
Queen Introduction
Introducing a new queen to a hive can be a delicate process. If not done correctly, the resident worker bees may reject or harm the new queen. Here are some tips for successful queen introduction:
1. Isolation: Before introducing the new queen, she should be isolated in a cage that allows the workers to become familiar with her pheromones without direct contact.
2. Timing: The introduction is often done during a period when the colony is queenless or when their queen’s pheromones are weak. This increases the likelihood of acceptance.
3. Candy Plug or Attendants: Some queen cages have a candy plug that the worker bees gradually eat through to release the queen. Alternatively, cages with queen attendants can be used. These attendants feed and groom the queen, helping to establish her acceptance within the colony.
4. Observe Closely: Once introduced, it’s crucial to monitor the hive closely to ensure the new queen is accepted. Bees may take some time to get used to her presence.
Queen Replacement
Queen replacement is necessary when a queen bee becomes old, fails to perform adequately, or shows signs of illness. The process involves:
1. Identifying the Issue: Recognize the signs of an underperforming or failing queen, such as reduced egg-laying, erratic brood patterns, or aggressive worker bees.
2. Locating the Queen: Find the current queen within the hive.
3. Remove and Replace: Carefully remove the old queen and replace her with a new, healthy queen.
4. Monitor and Assess: After replacement, closely monitor the hive to ensure the new queen is accepted and begins laying eggs promptly.
Effective queen rearing, introduction, and replacement are fundamental skills for beekeepers. They help maintain the strength and vitality of the bee colony, ensuring a productive and thriving hive. It’s essential for beekeepers to understand these techniques and employ them when necessary to support their bee colonies.
Section 5: Harvesting Honey and Hive Products
5.1 Harvesting Honey
Harvesting Honey Responsibly
Harvesting honey is a highly rewarding part of beekeeping, but it’s crucial to do it in a way that minimizes disruptions to the colony and prioritizes the health of your bees.
1. Timing: The timing of your honey harvest is crucial. It’s essential to choose a time when the bees have capped the honey cells. This indicates that the honey is sufficiently dehydrated and ready for harvest. Bees cap honey cells when the moisture content is around 18% or lower. Harvesting too early can result in honey that’s too watery and prone to fermentation.
2. Gather Necessary Equipment: Before harvesting honey, gather the necessary equipment. You’ll need a beekeeper’s suit or protective clothing, gloves, a smoker to calm the bees, a bee brush, a honey extractor, jars or containers for the honey, and a sharp knife for uncapping the honeycomb.
3. Smoke the Hive: To prepare for harvesting, use your smoker to gently calm the bees. Smoking the hive helps to mask alarm pheromones and keeps the bees less agitated during the process.
4. Remove Honey Supers: Honey supers are the boxes containing the frames full of honey. They’re usually added above the brood boxes. Before removing the supers, ensure the bees have been adequately smoked and are calm. Carefully lift the frames and check that at least 80% of the cells in a frame are capped. Uncapped cells mean the honey is not yet ripe.
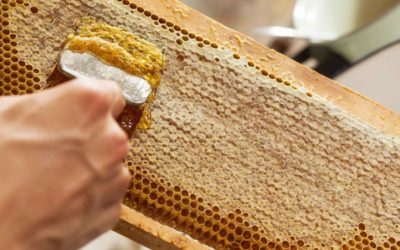
5. Uncapping: Uncapping is the process of removing the wax seal from the honey cells. Use a sharp knife to do this. You can do it over a special uncapping tank or tray to collect the wax and any honey that drips off. The removed cappings can be used to make beeswax products.
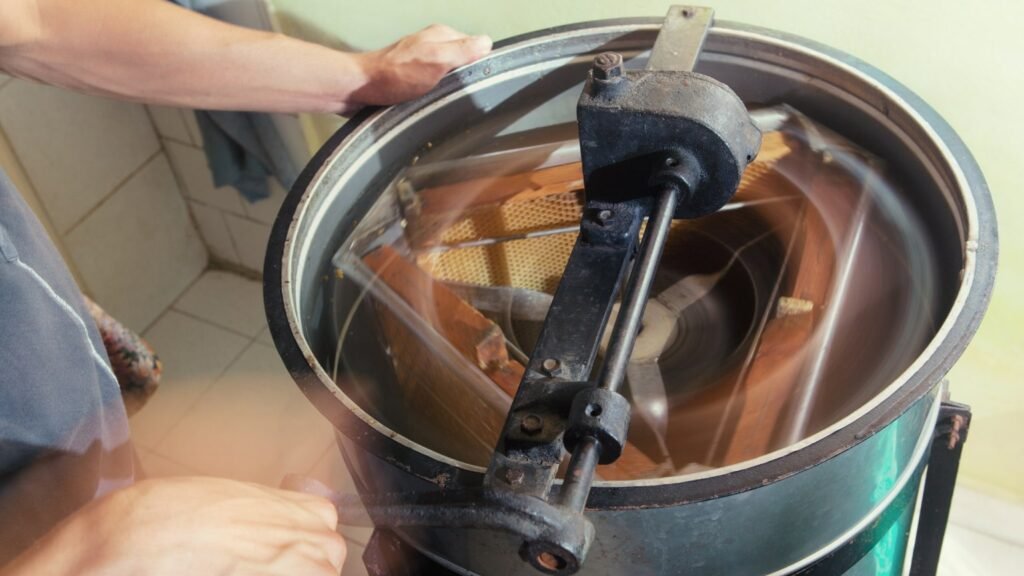
6. Extracting Honey: The frames with uncapped cells are then placed in a honey extractor. The extractor spins the frames, using centrifugal force to remove the honey. The honey is collected at the bottom of the extractor. Ensure that you use a honey filter to strain out any residual wax or debris.
7. Return Supers to Hive: After extracting the honey, return the supers to the hive. The bees will clean out any remaining honey and reuse the frames. This reduces waste and supports the health of the colony.
8. Storage: Store the harvested honey in clean, airtight containers. Make sure the containers are sealed properly to prevent moisture from entering, as excess moisture can cause fermentation.
9. Share with Your Bees: It’s a good practice to leave some honey for your bees. Especially in the winter, bees need honey stores for sustenance. The honey you leave for them can be a lifeline during the colder months when foraging is limited.
10. Label and Enjoy: Label your honey containers with the harvest date and any specific details about the honey, such as its floral source. Enjoy the fruits of your beekeeping labour and share your honey with friends and family.
By following these steps, you can harvest honey from your hives while ensuring the welfare of your bees. Responsible and considerate honey harvesting not only provides you with a delicious natural product but also supports the health and well-being of your bee colony.
Buy Raw and Natural Honey
Embark on a global honey adventure in Singapore! Explore a curated selection of raw honey from around the world, each offering unique flavors and regional essence. Sourced from pristine environments, our natural honey is a sweet journey you won’t want to miss. Discover the flavors of nature from distant corners of the Earth, all conveniently available here. Order your global honey experience today!
5.2 Other Hive Products
Absolutely, let’s explore the various hive products beyond honey that your bees can provide and how to collect and use them.
1. Beeswax
Collection: Beeswax is collected by scraping it off the frames or using a solar wax melter, which uses the sun’s heat to melt the wax and separate it from debris. You can also use a method called the “cappings method” during honey extraction, where wax cappings are collected from the frames’ honey cells.
Uses: Beeswax is an incredibly versatile product. It’s used in making candles, skincare products (like lip balms and lotions), beeswax wraps for food storage, and even in art and craft projects. Beeswax candles are particularly popular because they burn cleanly and emit a pleasant, natural fragrance.
2. Propolis
Collection: Propolis, also known as “bee glue,” is collected by scraping it from hive surfaces. It’s a sticky substance bees create by mixing tree resins with their own secretions.
Uses: Propolis has antimicrobial and antiseptic properties, making it useful for hive maintenance and bee health. It can be used in various medicinal products, such as throat sprays and tinctures, to support the human immune system.
3. Royal Jelly
Collection: Royal jelly is produced by worker bees and fed to bee larvae, particularly to those destined to become queens. It can be collected using special devices placed in the hive, or by removing the queen cells, which are rich in royal jelly.
Uses: Royal jelly is often consumed as a nutritional supplement for its potential health benefits. It’s claimed to have anti-aging and antioxidant properties and is considered a superfood. Some people take it in its natural form, while others prefer it in capsules or mixed with honey.
4. Bee Pollen
Collection: Bee pollen is collected from the bees as they return to the hive with pollen attached to their hind legs. Special devices, known as pollen traps, are used at the hive entrance to scrape pollen off the bees’ legs.
Uses: Bee pollen is a highly nutritious substance, rich in vitamins, minerals, and protein. It’s consumed as a dietary supplement and is believed to provide various health benefits. Some people add it to smoothies, cereal, or yogurt for a nutritional boost.
5. Comb
Collection: The comb, made of beeswax, is collected by cutting out the frames from old hive boxes, especially during hive maintenance or when changing comb.
Uses: Beeswax comb can be rendered into pure beeswax for various applications, including making candles, cosmetics, and beeswax food wraps.
6. Mead
Uses: Mead, often referred to as “honey wine,” is an alcoholic beverage created by fermenting honey with water. Beekeepers can produce their mead using their honey, making it a delightful homemade product to enjoy and share with friends and family.
By collecting and utilizing these hive products, you can make the most of your beekeeping experience. Each of these products has its unique qualities and uses, providing you with a wide range of possibilities, from crafting to health and nutrition. Plus, it’s a sustainable and eco-friendly way to make the most of what your bees produce.
Section 6: Hive Health and Disease Management
6.1 Recognizing Common Diseases
Bee colonies can suffer from diseases like American Foulbrood and Varroa mites. Learn to identify and address these common threats to your hive’s health.
1. American Foulbrood (AFB)
Identification: AFB is a highly contagious bacterial disease caused by Paenibacillus larvae. Its symptoms include sunken, greasy-looking cappings on the brood cells, a foul odor, and a ropiness when a toothpick is inserted into the cell. You may also notice discolored larvae that change from pearly white to brown.
Addressing AFB: AFB is a serious disease that requires immediate action. The affected colony must be destroyed to prevent the disease from spreading. The equipment should be scalded with boiling water and thoroughly cleaned. It’s essential to report the disease to local authorities as it’s a notifiable disease in many regions.
2. Varroa Mites
Identification: Varroa destructor mites are external parasites that feed on both adult bees and developing brood. Signs of Varroa infestation include deformed wings, discolored and perforated brood caps, and a weakened bee population. You can also conduct a “sugar roll” test to monitor mite levels.
Addressing Varroa Mites: Varroa mites are a persistent threat, but there are several treatment options. Integrated Pest Management (IPM) strategies include using miticide treatments, such as formic acid or thymol-based treatments. Drone brood removal and screened bottom boards can also help reduce mite populations. Monitoring and timely treatment are crucial for managing Varroa mites.
3. Nosema
Identification: Nosema is a gut parasite that affects adult bees. Its symptoms include dysentery (bees defecating inside the hive) and reduced foraging activity. Microscopic analysis is required to definitively identify Nosema.
Addressing Nosema: Treatments for Nosema include the use of fumagillin or thymol-based treatments. Proper hygiene and ensuring bees have access to clean water sources can help reduce the risk of infection. Regular inspections and monitoring for signs of Nosema are essential.
4. Chalkbrood
Identification: Chalkbrood is a fungal disease affecting bee brood. Infected larvae turn chalky white and become mummified. You may notice chalkbrood mummies on the bottom board and at the hive entrance.
Addressing Chalkbrood: Chalkbrood usually doesn’t require treatment unless the infestation is severe. Strong colonies can manage the disease on their own. However, good hive hygiene, maintaining colony strength, and ensuring good ventilation can help prevent chalkbrood.
5. European Foulbrood (EFB)
Identification: EFB is another brood disease but is bacterial, caused by Melissococcus plutonius. Symptoms include dead and rotting larvae that become yellow or brown, often in a twisted or spiral shape.
Addressing EFB: Like AFB, colonies affected by EFB must be destroyed. This is a notifiable disease, and it’s essential to report it to local authorities. Hygienic measures, including requeening and sterilizing equipment, are crucial to prevent its spread.
Being able to identify these common threats and having a plan for addressing them is essential for beekeepers. Regular hive inspections, monitoring, and following best practices for beekeeping hygiene can significantly reduce the risks and impact of these diseases and pests.
6.2 Sustainable and Natural Beekeeping Practices
Explore sustainable and natural methods to promote hive health, such as integrated pest management (IPM) and chemical-free approaches.
Integrated Pest Management (IPM)
1. Monitoring: Regular hive inspections and monitoring are fundamental in IPM. Beekeepers should keep a close eye on their hives to detect any signs of diseases or pest infestations early.
2. Drone Brood Removal: Varroa mites prefer drone brood for reproduction. Beekeepers can use a technique called “drone brood removal” by uncapping and removing drone brood frames periodically. This disrupts the mites’ reproduction cycle.
3. Screened Bottom Boards: Installing screened bottom boards in beehives can assist in mite management. When mites fall off bees, they pass through the screen and out of the hive, reducing their numbers.
4. Selective Breeding: Beekeepers can select for mite-resistant bee strains in their breeding programs. Some bee populations exhibit natural resistance to Varroa mites, and propagating these traits can reduce reliance on chemical treatments.
Chemical-Free Approaches
1. Essential Oils: Essential oils such as thymol and eucalyptus oil can be used as natural miticides. These oils are placed in beehives or vaporized to help control Varroa mite infestations. However, essential oils should be used with care and in appropriate concentrations to avoid harming the bees.
2. Sugar Dusting: A chemical-free method for mite control involves dusting bees with powdered sugar. This encourages grooming behaviour, causing mites to fall off the bees. Beekeepers can then remove the sugar-coated mites from the hive.
3. Drone Comb Trapping: Beekeepers can use specially designed frames with drone-sized cells. Mites prefer drone brood for reproduction, so trapping them in drone comb frames can help control mite populations.
4. Natural Beekeeping Practices: Adopting natural beekeeping practices focuses on allowing bees to express their natural behaviours and immune responses. This includes providing hives with natural comb, avoiding synthetic chemicals, and minimizing hive interventions.
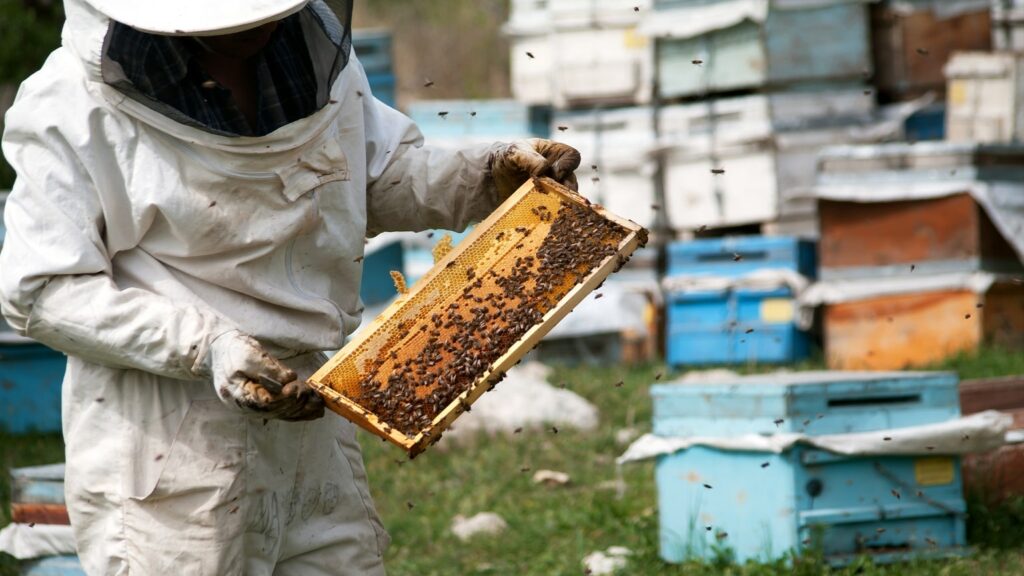
Hive Location and Forage Management
1. Locational Considerations: Hive location plays a significant role in hive health. Bees need access to diverse and pesticide-free forage. Choosing locations that offer a variety of nectar and pollen sources can promote hive health.
2. Avoid Pesticides: Ensure that the area around your hives is free from chemical pesticides. Bees can forage over several miles, so pesticide exposure can have adverse effects.
3. Promote Biodiversity: Encouraging biodiversity in your surrounding environment can provide a rich source of forage for your bees and improve their overall nutrition.
It’s important to emphasize that sustainable and natural methods in beekeeping often require a deeper understanding of bee biology and ecosystem management. Additionally, the effectiveness of these methods may vary depending on local conditions, bee strains, and specific beekeeping goals. Beekeepers should continuously educate themselves and adapt their practices to ensure the health and well-being of their colonies while minimizing the use of chemical interventions.
Section 7: Tips for Success
7.1 Beekeeping Calendar
We’ll provide a year-round calendar that outlines tasks and hive management activities, ensuring you stay organized and proactive. This approach is essential for keeping your bee colony healthy and productive throughout the seasons:
Spring (March to May):
- Hive Inspections: Start with thorough hive inspections to assess overwintered colonies’ strength and health.
- Feeding: If food stores are low, provide sugar syrup to stimulate brood rearing.
- Swarm Prevention: Monitor for signs of swarming, like queen cells, and perform splits if necessary.
- Supers: Add honey supers to the hives as nectar flow increases.
Summer (June to August):
- Hive Expansion: Continue hive inspections, ensuring adequate space for a growing colony.
- Varroa Mite Management: Implement mite control methods like screen bottom boards or drone brood removal.
- Harvesting: Depending on local flora, harvest honey when frames are capped and ready.
- Disease Checks: Keep an eye out for signs of diseases, including American Foulbrood or chalkbrood, and address them promptly.
Autumn (September to November):
- Feeding: If honey stores are low, feed bees with sugar syrup for winter.
- Mite Control: Assess mite levels and implement control measures if needed.
- Reducing Hive Size: Condense colonies into single brood boxes for winter.
- Winter Preparations: Ensure hives are well-ventilated and insulated for the colder months.
Winter (December to February):
- Monitoring: Periodic checks to ensure colonies have enough food stores.
- Clean Hives: Remove dead bees and debris from the bottom boards.
- Record Keeping: Use this time to update your beekeeping records and plan for the upcoming season.
- Continued Mite Control: Implement strategies to keep mite levels in check as they can be especially harmful during winter.
Year-Round Tasks:
- Education: Continuously educate yourself on beekeeping practices and stay updated on the latest information and research.
- Bee Health: Regularly monitor your bees for signs of diseases, pests, and abnormal behavior.
- Equipment Maintenance: Clean and repair beekeeping equipment as needed.
- Local Regulations: Stay informed about local beekeeping regulations and any changes that might affect your practices.
- Join Beekeeping Associations: Consider joining local beekeeping associations for support and networking opportunities.
The specifics of this calendar may vary depending on your region’s climate, local flora, and the goals of your beekeeping operation. It’s important to adapt your schedule and activities accordingly. Additionally, remember that observing your bees’ behaviour and needs is crucial, as they may sometimes deviate from typical patterns.
A year-round calendar helps you manage your hives effectively, promotes bee health, and maximizes honey production. It also ensures that you’re proactive in addressing issues that could impact your bees.
7.2 Troubleshooting
In beekeeping, challenges may arise. This section addresses common problems and offers solutions to keep your bees healthy and productive.
1. Varroa Mites
- Challenge: Varroa mites are a significant threat to bee colonies, as they weaken and transmit diseases to bees.
- Solution: Regular mite control measures include screen bottom boards, drone brood removal, and organic treatments like oxalic acid or formic acid. Monitoring mite levels is crucial for timely intervention.
2. Hive Beetles
- Challenge: Hive beetles can infest beehives, causing damage to honey stores and comb.
- Solution: Reducing hive entrance size, using beetle traps, and keeping strong colonies that can defend against beetles can help control infestations.
3. American Foulbrood (AFB)
- Challenge: AFB is a bacterial disease that can decimate bee colonies if not detected and managed.
- Solution: Regular hive inspections can identify AFB early. Infected hives should be burned to prevent the spread of the disease. Follow local regulations for handling AFB.
4. Chalkbrood
- Challenge: Chalkbrood is a fungal disease that affects bee larvae, causing mummification.
- Solution: While not as severe as AFB, chalkbrood can weaken hives. Improved hive ventilation, replacing old comb, and hygienic bee strains can help manage this disease.
5. Swarming
- Challenge: Bees swarm when colonies become overcrowded, potentially reducing honey production.
- Solution: Regularly inspect hives to prevent overcrowding. Provide additional space or perform splits to reduce the urge to swarm.
6. Lack of Forage
- Challenge: Bees need a diverse range of nectar and pollen sources for nutrition.
- Solution: Ensure your beekeeping location has adequate forage, plant bee-friendly flowers and trees, and, if needed, provide supplementary feeding in lean periods.
7. Pesticides
- Challenge: Exposure to pesticides can harm bees.
- Solution: Be aware of local agricultural practices and try to keep your bees in areas with minimal pesticide use. Additionally, provide clean water near the hives to reduce foraging at potentially contaminated sources.
8. Extreme Weather
- Challenge: Harsh weather conditions can stress bee colonies.
- Solution: Protect hives from extreme cold with insulation and consider shade during hot weather. Ensure bees have enough honey stores to survive the winter.
9. Robbing
- Challenge: Weaker hives can fall victim to robbing by stronger colonies.
- Solution: Reduce hive entrances during robbing season, and address weak colonies to prevent robbing.
10. Equipment Maintenance
- Challenge: Neglected or damaged equipment can lead to issues.
- Solution: Regularly clean and maintain beekeeping equipment, inspect hives, and repair or replace damaged parts.
11. Bee Health Monitoring
- Challenge: Monitoring bee health is crucial, but beginners may find it challenging.
- Solution: Learn to observe bee behaviour, check for signs of disease, and keep detailed records of hive inspections to track your bees’ health.
Addressing these challenges is essential for successful beekeeping. Regular hive inspections and ongoing education are key to identifying and addressing issues promptly. Each challenge comes with its unique set of signs and solutions, and understanding these nuances will contribute to the overall health and productivity of your bee colony.
Conclusion
Embarking on a journey into beekeeping is not just about harvesting honey; it’s a fulfilling and educational experience that fosters a deeper connection with nature. By following this beginner’s guide, you’ll be well-equipped to nurture your hive and enjoy the sweet rewards of fresh, local honey while contributing to the well-being of these essential pollinators. Welcome to the world of beekeeping!